x402 Tutorial
Implement x402 from scratch and have a paid API endpoint running in five steps. Copyable server + client code, tested for free on a testnet — no private key on your server.
How do I implement x402 from scratch?
Install @x402/express and wrap the route you want to charge for with a price and your receiving wallet address, pointed at a facilitator (the hosted Coinbase CDP one works on Base). Test on Base Sepolia with free faucet USDC, then switch the network to base to go live — no private key needed on your server.
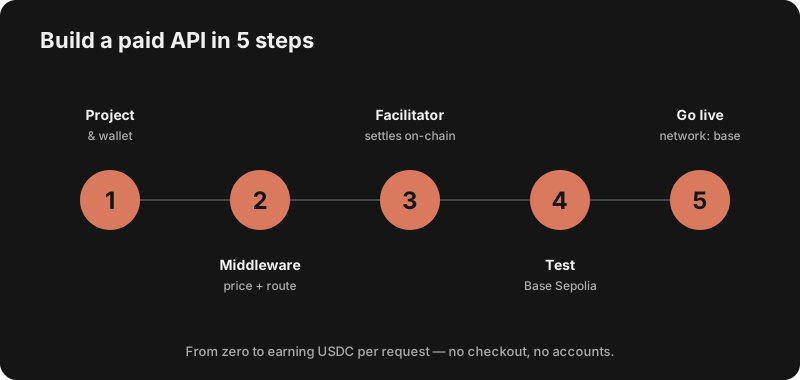
Create a Node project and get a receiving wallet. You only need a wallet address to receive USDC — no private key in your server.
Install @x402/express and wrap the route you want to charge for with a price and your wallet address.
A facilitator verifies and settles payments on-chain. The hosted Coinbase CDP facilitator works on Base with no infra of your own.
Run against Base Sepolia and pay with free faucet USDC, so you never spend real money while building.
Switch the network to base and use a real receiving wallet. That’s it — your endpoint now charges per call.
Step 1 — Create the project
mkdir x402-demo && cd x402-demo
npm init -y
npm install express @x402/express
Step 2–3 — Add the paywall & facilitator
One middleware turns a normal route into a paid one. The route handler only runs after a valid USDC payment; everything else returns HTTP 402.
// server.js
import express from "express";
import { paymentMiddleware } from "@x402/express";

const app = express();

// Charge $0.01 in USDC for GET /weather
app.use(
  paymentMiddleware(
    "0xYourReceivingWalletAddress",       // where the money lands
    {
      "GET /weather": {
        price: "$0.01",
        network: "base-sepolia",          // testnet first
      },
    },
    { url: "https://x402.org/facilitator" } // hosted facilitator
  )
);

app.get("/weather", (req, res) => {
  // This only runs AFTER a valid payment
  res.json({ city: "Tokyo", forecast: "sunny", temp_c: 24 });
});

app.listen(3000, () => console.log("http://localhost:3000"));
Step 4 — Test it
# 1. No payment -> you get HTTP 402 with payment details
curl -i http://localhost:3000/weather
# HTTP/1.1 402 Payment Required
# { "accepts": [ { "scheme": "exact", "network": "base-sepolia", ... } ] }

# 2. An x402-aware client (or the @x402/fetch wrapper) signs a USDC
#    payment, retries, and gets a 200 with the JSON body.
Here's a tiny client that pays automatically — the same pattern an AI agent uses:
// client.js  — an agent/script that pays automatically
import { wrapFetchWithPayment } from "@x402/fetch";
import { createWalletClient, http } from "viem";
import { privateKeyToAccount } from "viem/accounts";
import { baseSepolia } from "viem/chains";

const account = privateKeyToAccount(process.env.PRIVATE_KEY);
const wallet = createWalletClient({ account, chain: baseSepolia, transport: http() });

const fetchWithPay = wrapFetchWithPayment(fetch, wallet);
const res = await fetchWithPay("http://localhost:3000/weather");
console.log(await res.json()); // { city: "Tokyo", ... }
Step 5 — Go live
Change network from base-sepolia to base and use a real receiving wallet. Deploy as usual. Your endpoint now earns USDC per call — no invoices, no checkout, no accounts. For other frameworks see the SDK guide; for Next.js see the Next.js guide.
Frequently asked questions
How do I implement x402 from scratch?
Spin up a Node/Express server, install @x402/express, and wrap the route you want to monetize with the payment middleware — passing a price and your receiving wallet address. Point the middleware at a facilitator (the hosted Coinbase CDP one works on Base), test against Base Sepolia with free faucet USDC, then switch the network to base for production. The five steps and full code are on this page.
Do I need a private key on my server to accept x402 payments?
No. Your server only needs a receiving wallet address to be paid. The private key lives on the payer/client side. That makes the server simple and safe — it just verifies payments via the facilitator and serves the response.
How do I test x402 without spending real money?
Use a testnet. Set the network to base-sepolia and fund a test wallet from a free USDC faucet. The whole flow — 402 challenge, payment, retry, 200 response — works identically to mainnet, so you can develop and debug for free, then flip the network to base when you go live.
What is a facilitator and do I have to run one?
A facilitator verifies the payment and settles it on-chain so your server doesn’t have to handle blockchain logic. You do not have to run your own — hosted facilitators (e.g. Coinbase CDP) handle settlement on Base. You can self-host later if you want full control.
How does the client actually pay?
An x402-aware client wraps fetch (e.g. @x402/fetch). On a 402 response it reads the payment requirements, signs a USDC transfer with its wallet, and retries the request with the payment attached. AI agents do this automatically, which is the whole point — software paying software without a checkout page.
Which networks and currencies does x402 support?
x402 settles in USDC and runs on Base and other EVM chains, with Solana support as well. Start on Base (or Base Sepolia for testing); see our x402 on Solana guide if you target the Solana ecosystem.
Next: starter kits & demos · SDKs by language · facilitators · gateways